


How to Enter a Vendor
Once a vendor is entered, you can create purchase orders, invoices, and make payments to the vendor.
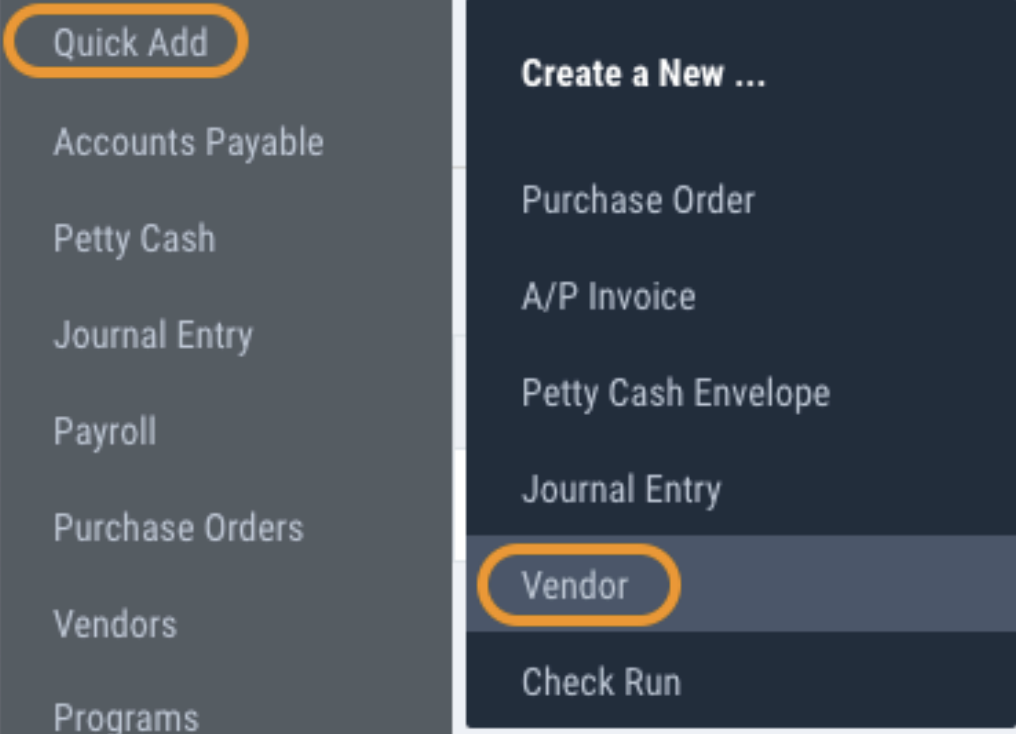
1) From the Left Panel, navigate to Quick Add > Vendor
2) The vendor number is auto-generated. Vendor number can be overwritten to apply a custom vendor code. Enter a vendor name. Select the applicable Entity type to enable the Tax Code selection and add their Tax ID.
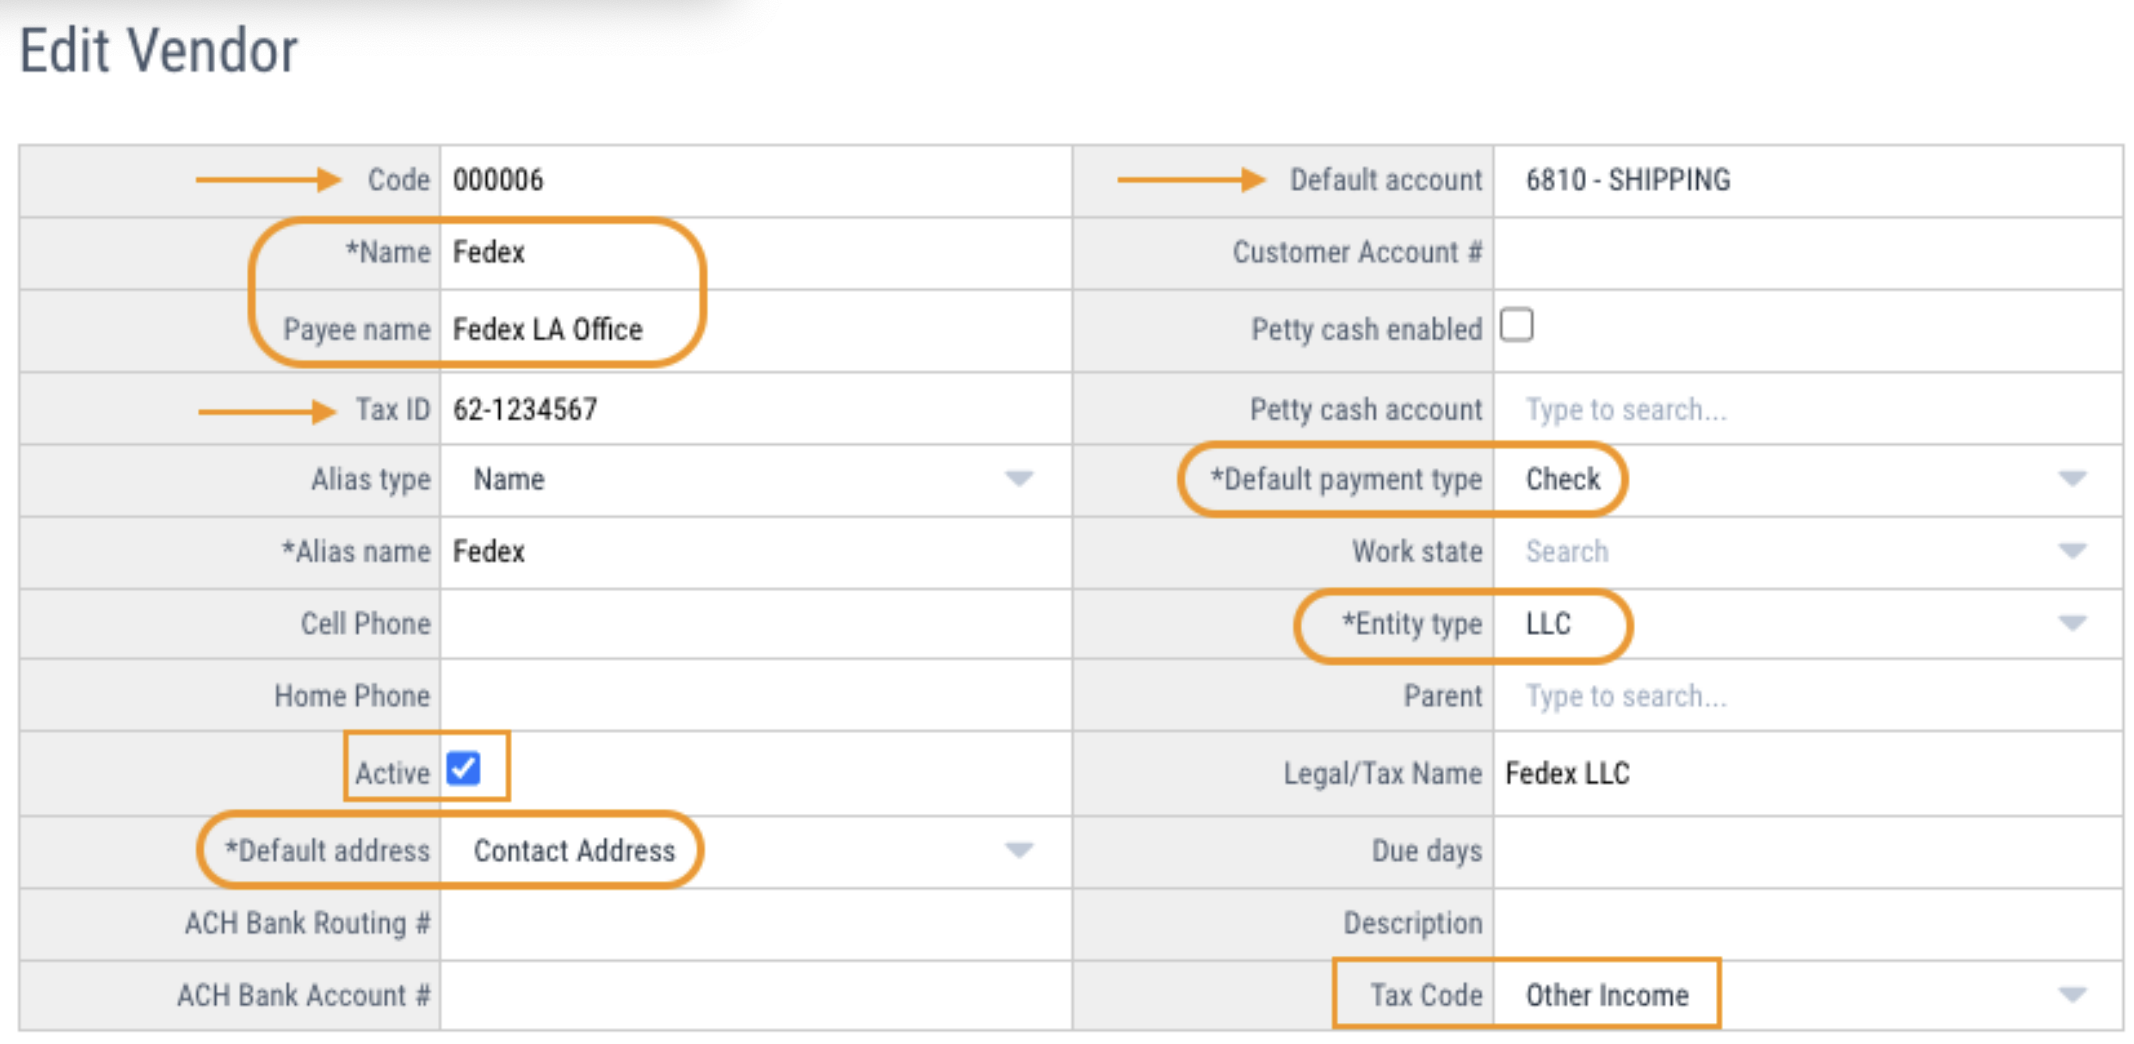
ProTips: A different name can be entered for the Payee which gets printed on checks. When a Default account is entered, it will auto-populate the GL code in entry modules. Default payment type can be updated, if the vendor will be paid via a Wire Transfer or EFT instead of printed check. Uncheck the Active button to disable a vendor.
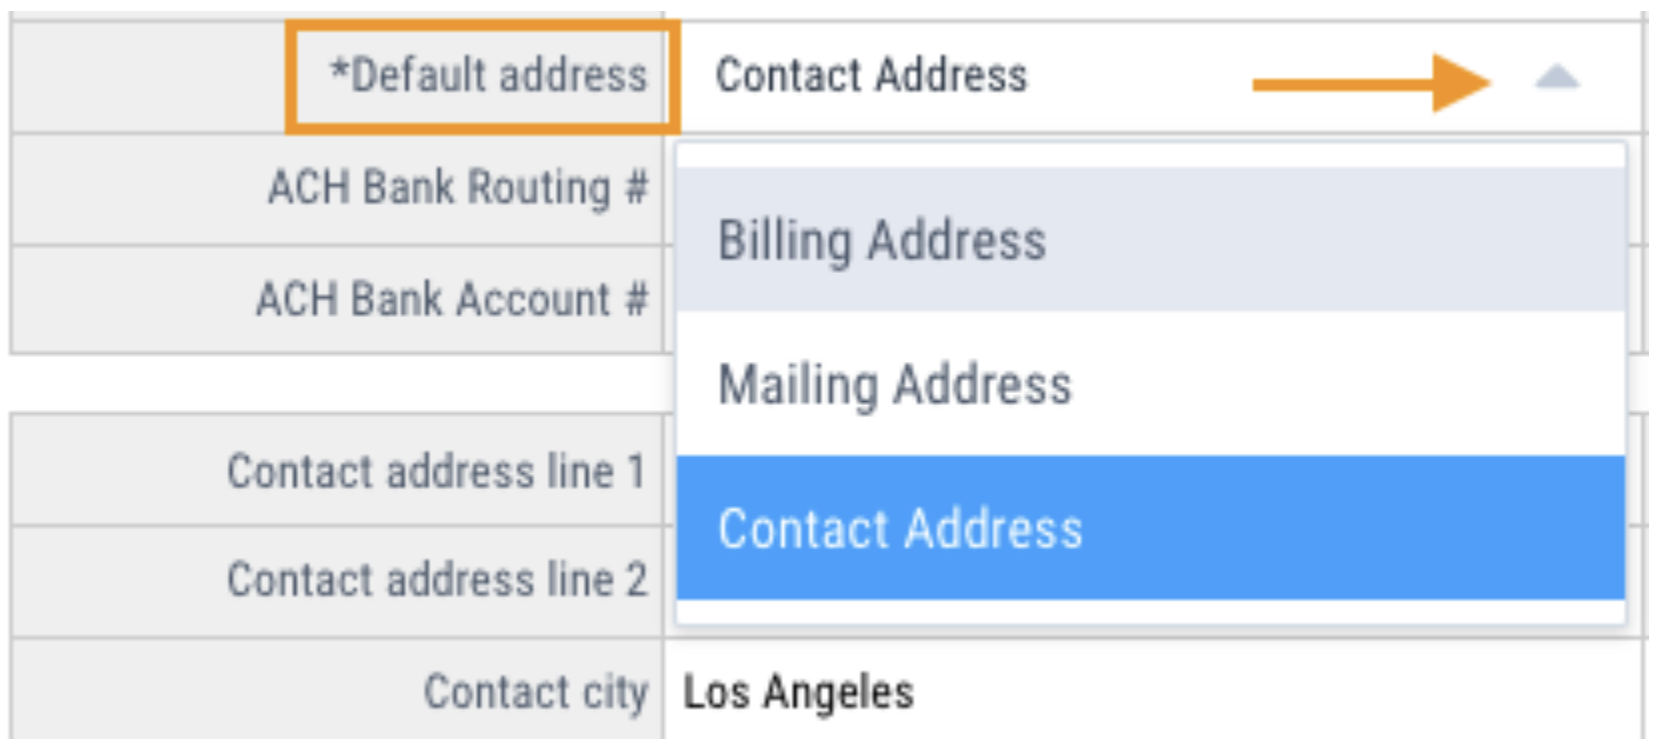
3) Address information is optional. If you need to add multiple addresses for a vendor Contact, Mailing, and Billing address are available. Select the address you would like to default for payments.
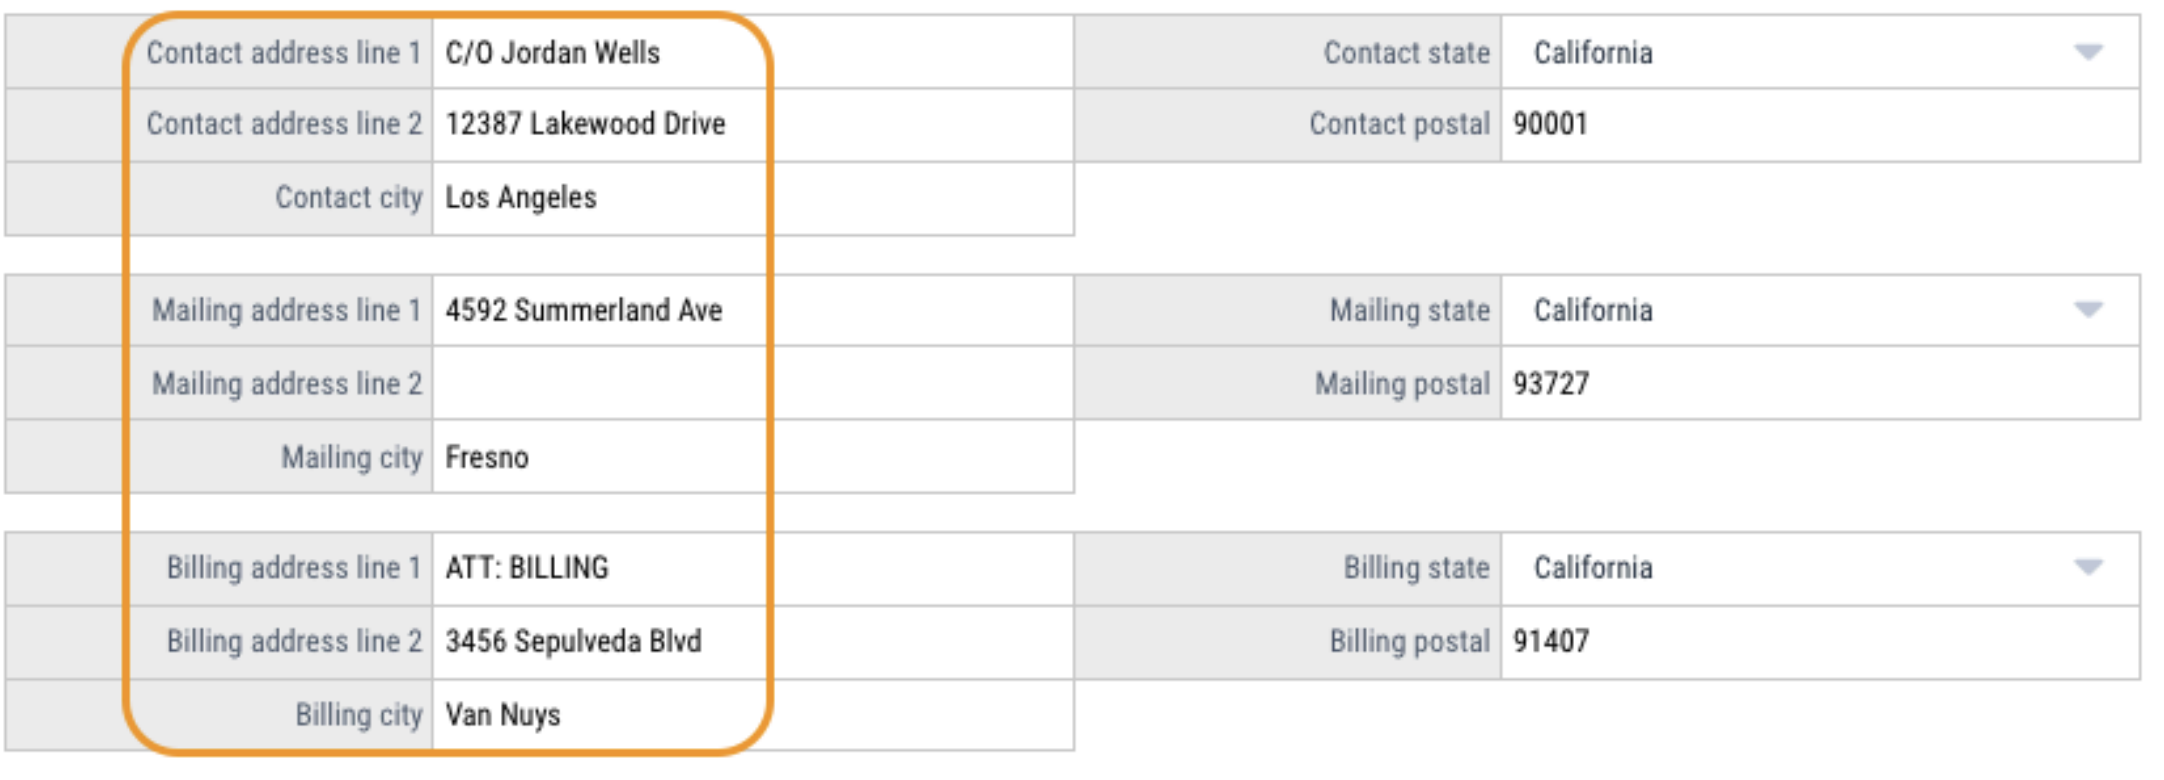
ProTip: If you need to add an Attention, DBA, or C/O line to print on a check, you can type the name in Address Line 1 (ex. ATT: BILLING) and then type the actual Address in Line 2.
The Payee Block of check will print as follows:
Fedex LA Office
ATT: BILLING
3456 Sepulveda Blvd
Van Nuys, CA 91407
Questions? Need more help?
Please email support at support@revolutiones.com or call 800-985-9238 M-F 6am-6pm (PST). If it's outside our business hours, we will get back to you as soon as we can.