


How to Create a Timecard on a Computer
1) Please log in HERE
2) After logging in, select a project or show to access the employee dashboard. If you have a red "Finish Start Paperwork" button, please click that first and complete your start.
- Click the small blue down arrow to make sure you're creating a timecard for your correct project
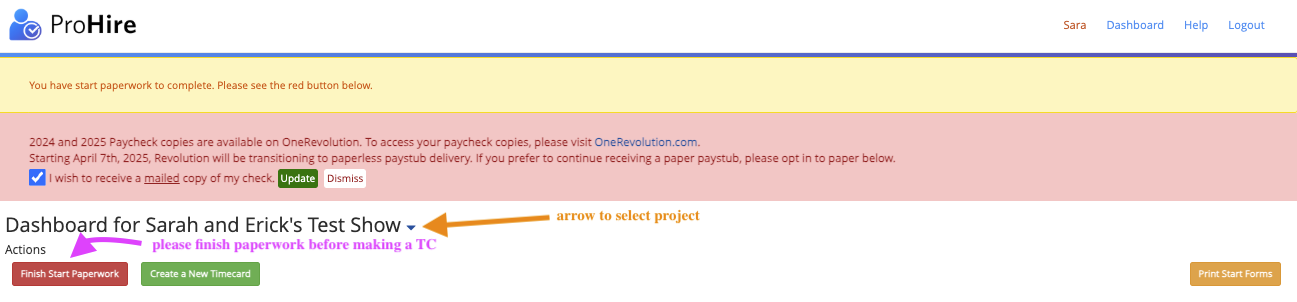
3) Select “Create a New Timecard”

4) Select the Week ending date you are currently in. Click on the date, and a calendar will open where you can select your week-ending date

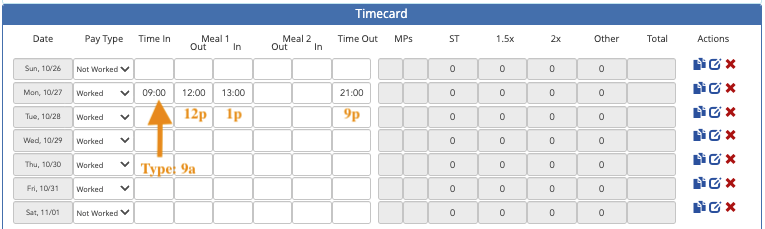
5) Enter work hours
Under "Pay Type," select “Worked” for your days worked and "Not Worked" for the days not worked.
When entering times you can enter “9” followed by “a” which will tell our system you clocked in at 9:00 AM.
Please follow up with “a” or “p” after entering the time if you are not using Military time. You will notice that your hour will be converted to military time.
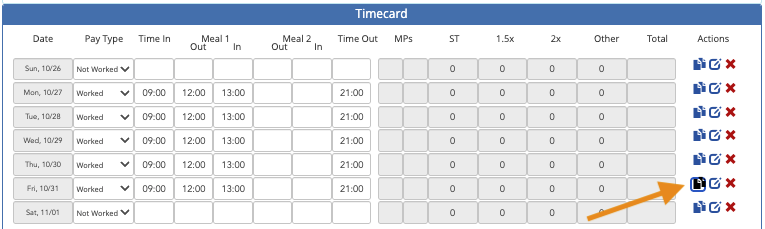
Under the "Actions" column on the right side, copy the previous day's hours with the double-paper icon.
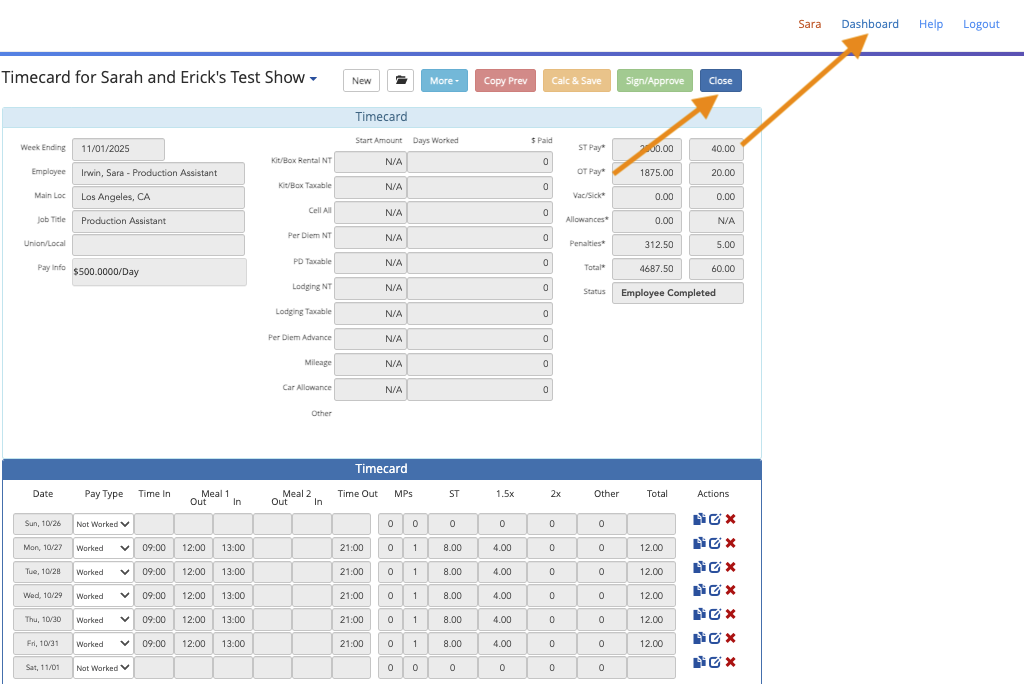
6) After entering your hours and if everything looks correct, click “Calc & Save” then click "Sign/ Approve" after all of your times are entered to send it to production. "Sign/Approve" locks your timecard for further editing.
- It is important to "Sign/Approve" on time to ensure payroll is processed without delay.

7) Click "Close" or "Dashboard" to return to your Dashboard.